Create a cute Halloween crochet garland featuring pumpkins and ghosts! 🎃👻 This beginner-friendly pattern includes step-by-step instructions and is perfect for seasonal home decor or handmade gifts.
© 2026 dariarsii. All rights reserved 💕
This pattern is for personal use only
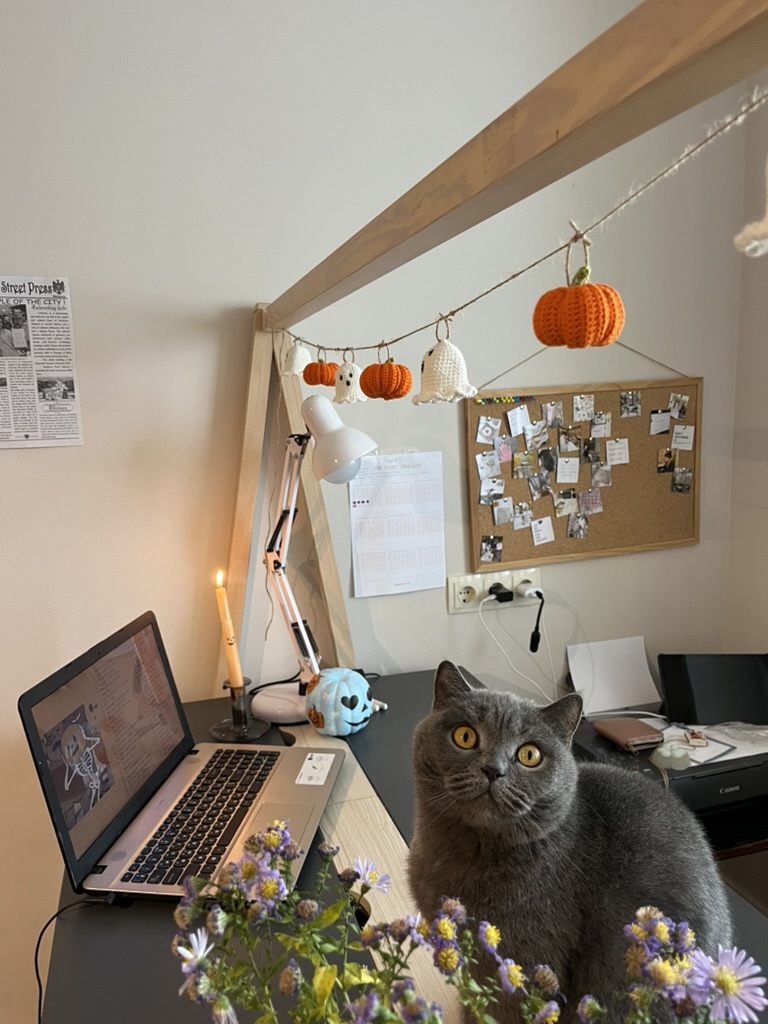
Halloween Crochet Garland Video Tutorial
📊 Pattern Info
Skill level: Beginner–Intermediate
Technique: Amigurumi
🧵 Materials
– Yarn (orange, white, green)
-Crochet hook
– Stuffing (for pumpkin shape)
– Yarn needle
– Twine or string for garland
✍️ Abbreviations
ch – chain
sl st – slip stitch
sc – single crochet
dc – double crochet
inc – increase (2 stitches in one stitch)
blo – back loop only
rnd – round st(s) – stitch(es)
Free Halloween Crochet Garland Pattern
🎃 Pumpkin Pattern
Body
– Ch 19
– Row 1: Sc in 2nd ch from hook, sc across (18 sc)
– Rows 2–36: Sc blo across (18 sc each row)
– Join: Slip stitch first row to Row 36
– Fasten off, leaving long tail
– Gather top and bottom using yarn needle, pull tight
– Lightly stuff before fully closing
Stem
– With green yarn: ch 10
– Row 1: Sc in 2nd ch from hook (9 sc)
– Fold and join with sl st
– Fasten off and weave ends
👻 Ghost Pattern
Body
– Magic ring, 6 sc
– Rnd 1: inc in each st (12)
– Rnd 2: (sc, inc) repeat (18)
– Rnd 3: (sc, sc, inc sc) repeat (18 sts)
– Rnd 4: (2 sc, inc sc) repeat (24 sts)
– Rnd 5: (3 sc, inc sc) repeat (30 sts)
– Rnds 6–14: sc around (30 sts)
– Rnd 15: (4 sc, inc sc) repeat (36 sts)
Bottom Shape (Waves)
- Skip 1 stitch
- 6 sc in next stitch
- Skip 1 stitch, sl st next
- Repeat to form wavy edge (about 9 waves)
Finish
- Sc across top edge
- Fasten off
🧵 Assembly
- Make small loops on each pumpkin and ghost
- Thread onto twine
- Space evenly
- Adjust layout as desired
💡 Notes
- You can adjust size by changing yarn thickness
- Stuff pumpkins lightly for 3D effect
- Ghost shape can be simplified for beginners
💌 Stay Connected
- Follow me on YouTube
- Save this pattern on Pinterest
- More patterns coming soon 💖
Categories
Leave a Reply